Create your first A/B test
Set up, preview and launch a test in Crovio, from a blank test or an idea.
On this page
An A/B test shows different versions of your store to different visitors and measures which one sells more. In Crovio, every test has a Control (your store as it is) and one or more variants.
1. Pick a test type
- Go to A/B tests and click New test. Or open an idea in Ideas and start a test from it, or ask Claude to build it.
- What do you want to do? asks first: Run an A/B test (split visitors and measure a winner) or Roll out a change (show a change without measuring it, see Roll out a change without testing). Pick Run an A/B test.
- What do you want to test? opens. Each card says what the type does and what it's best for. Filter by Content, Pricing, Offers, Shipping or Checkout, or use the arrow keys and Enter.
| Type | Use it to |
|---|---|
| Content edit | Change text, images and sections, no code needed |
| Code (CSS & JS) | Add your own CSS and JavaScript to each group |
| Split URL | Send each group to a different page |
| Template | Show each group a different theme template on the same pages |
| Theme | Show each group a different theme across the whole store, with no preview bar |
| Price | Test real prices on chosen products |
| Volume discount, Order discount, Product discount, Free gift, Buy X get Y | Test an automatic offer per group |
| Shipping rates, Free shipping, Shipping discount | Test shipping prices and thresholds |
| Checkout | Test blocks, upsells and payment or shipping methods in checkout |
Not sure? A content edit fits most ideas. More detail in Test types.
2. Name it
The draft opens with a name like "Price test · Oct 30". Click the name at the top to rename it. Pick something you'll recognise later, like "Free-shipping line above Add to cart".
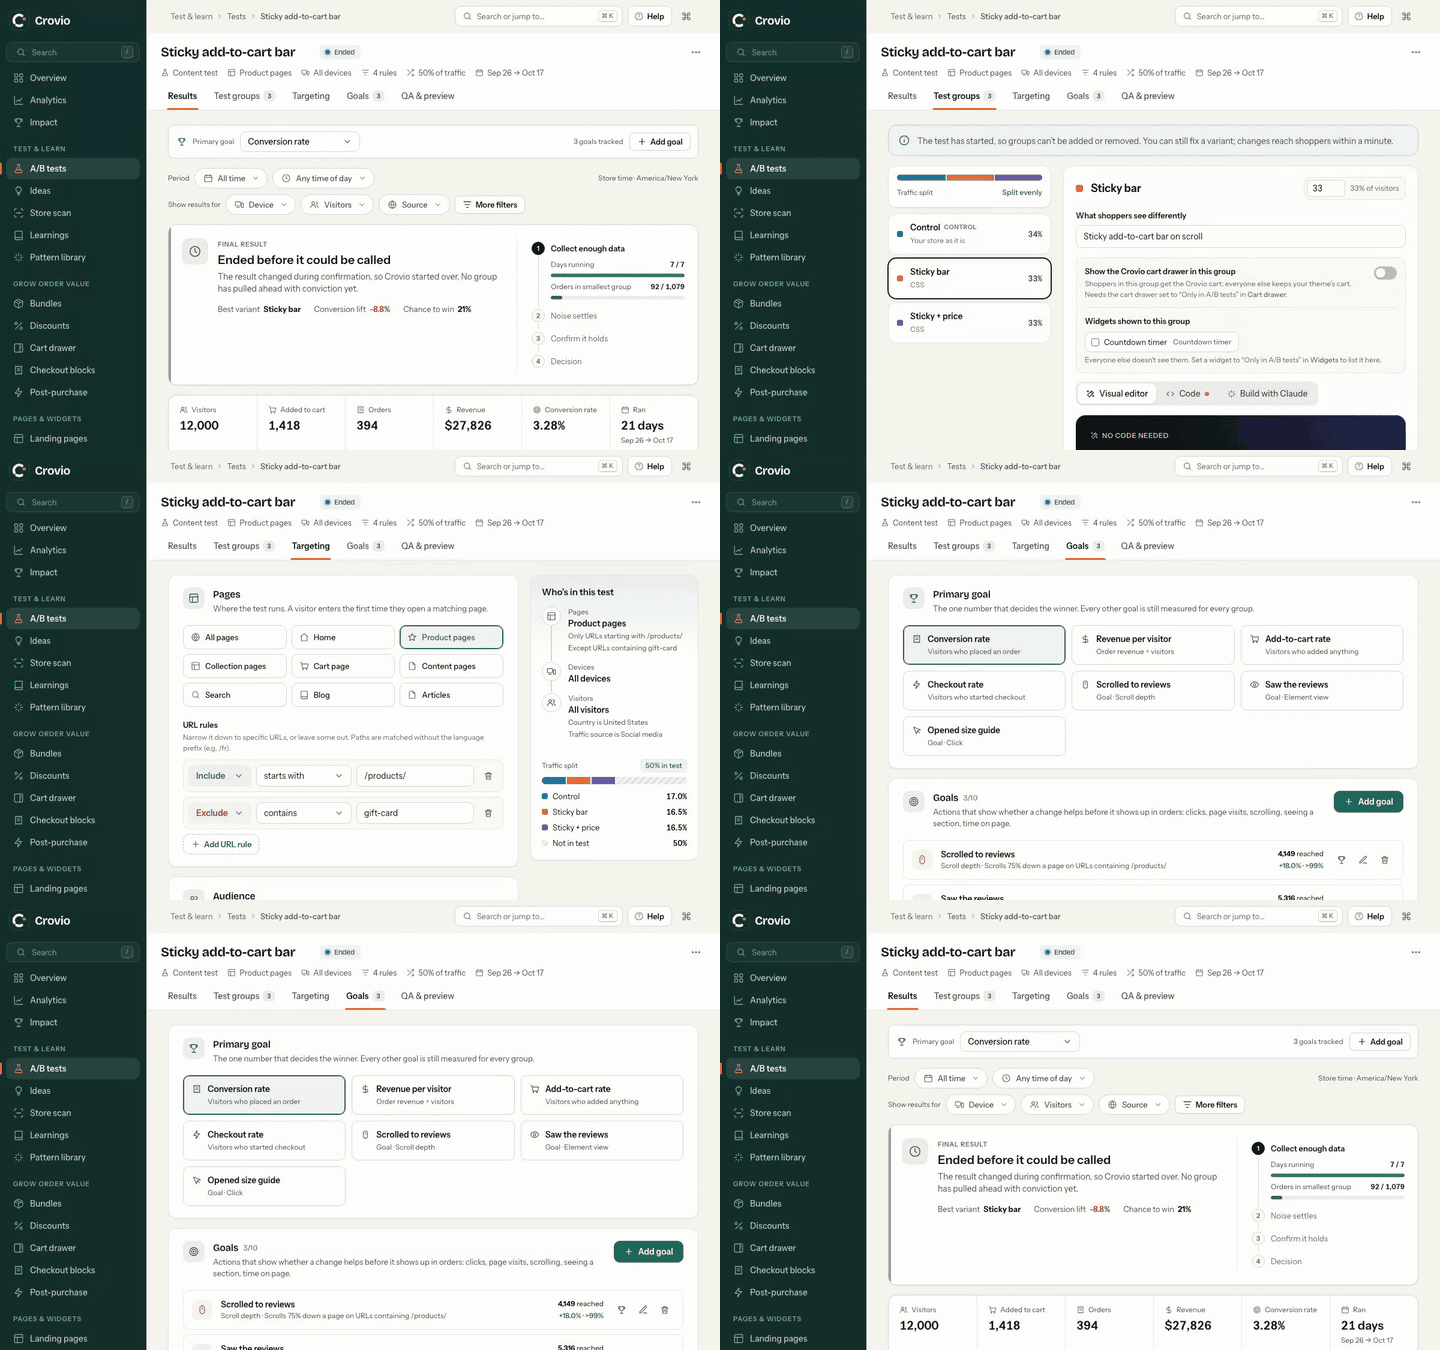
A new test opens as a Draft on its setup tabs, in the order you fill them in: the type's own tab first (what changes, for example Changes, Pages, Templates, Themes, Prices, Offer, Shipping or Checkout), then Targeting (where and for whom), Test groups (the versions and how visitors are split), Goals (what decides the winner) and QA & preview. Each tab has a Next button. Nothing reaches shoppers until you launch.
3. Make your variant
A new test has Control and Variant A. In a content test, the top of the Changes tab says which pages the test runs on (change them on Targeting). Build the change for each variant (other types have their own guide: template, split URL, price, offer, shipping rates, checkout):
- Visual editor: click Open visual editor, then click any text, image or button on your store to change it. No code needed. Use the visual editor.
- Code: write CSS and JavaScript. Code and AI builder.
- Build with AI: describe the change and Claude writes it, on your own Claude plan.
Click Save. To add more versions or change how visitors are split between them, use the Test groups tab: click Add group for more groups (up to five, including Control). Each row shows the group's colour, its name, what it shows and its Share of visitors. Visitors are split evenly by default. Type a share to change it: the other groups don't move, and the Total must reach 100% before you can save (Give the rest to Control or Take it from Control fixes it). Split evenly uses whole numbers; the padlock holds a group's share while you split the rest evenly. Click Save.
Optional: Describe this version under the editor is a note for you, so you remember what each version changes.
4. Choose who sees it
On Targeting, choose the pages the test runs on (for example Product pages), devices and visitor type. Traffic sources, rules, IP addresses, keeping shoppers out of other tests and how many visitors join are under Advanced targeting; most tests leave them as they are. Template and split URL tests pick their pages on their own tab. Price, offer, shipping and checkout tests run storewide, because the shopper's group has to reach the cart and checkout. Targeting and audiences.
5. Pick what decides the winner
On Goals, What decides the winner? is revenue per visitor unless you change it (content tests start on conversion rate). Orders, revenue, add to cart and checkout are tracked for every test anyway. Add custom metrics, like "Clicked Add to cart", to see early signals. Goals.
6. Check it, then launch
- On QA & preview, work through the Launch checklist: app embed on, tracking connected, a variant that changes the page, traffic split between groups.
- Click Preview next to each group to see your store as that group. Preview visits aren't counted.
- Click Launch test at the top. The dialog sums up exactly what goes live: who joins and where, what each group sees, what decides the winner and roughly how long a result takes. Tick I previewed each group and launch.
The test status changes to Live and the Results tab moves to the front. Visitors are counted the first time they see the test. Reading results.
Was this page helpful?